Photobucket Photobucket Photobucket Photobucket Photobucket Photobucket
Showing posts with label making your house your home. Show all posts

Wednesday, April 24, 2013

mini bathroom makeover

We started making over the bathroom months ago....and I think I can finally say it is done.  It's actually the only room in the house right now that doesn't have something that still needs to be done.  :)

These pictures are really poor quality because there is no natural light and the lens I used, but you get the picture.

This is the kids' bathroom (also the bathroom that guests use since we do not have a half bath).  Just a regular ole bathroom with two sinks, toilet, and tub.  ;)

Before:


After:

We {read: Geoff) painted the walls     by Behr (these pictures make it look a little green, but it's not at all...it's more of a taupe color and I really, really like it).  I knew I wanted to add some 'color' because I have so much white in there and I just needed add a little something.  ;)  But I have trouble with committing to color.  I love other people's homes that have color on the walls...but for me- I'm so fickle and doubt myself and then drive my myself (read: my husband) crazy. 

Most of the bathroom was inspired by this bathroom.

So Geoff spray painted the molding a glossy black and glued to mirror to make the frame.
I think it adds so much.  Believe it or not...we framed our mirror in our first home waaay before Pinterest.  :)  Our first home was a foreclosure and basically trashed...so we did a LOT of work to it.  Anyway- we had to take the bathroom mirror down and it accidentally cracked.  He came up with the idea to frame it and I always told him that it was a great mistake to make because it made such a difference in the bathroom!


I saw this sign on pinterest, as well, and knew it was what I wanted to go in their bathroom.


I purchased this white shower curtain soon after we moved in.  I did try to get a different shower curtain over the summer and it hung in there for a few months, but I just wasn't feeling it.  So I put the white curtain back up....which then motivated me to add the color to the walls because it was just too white!  :)


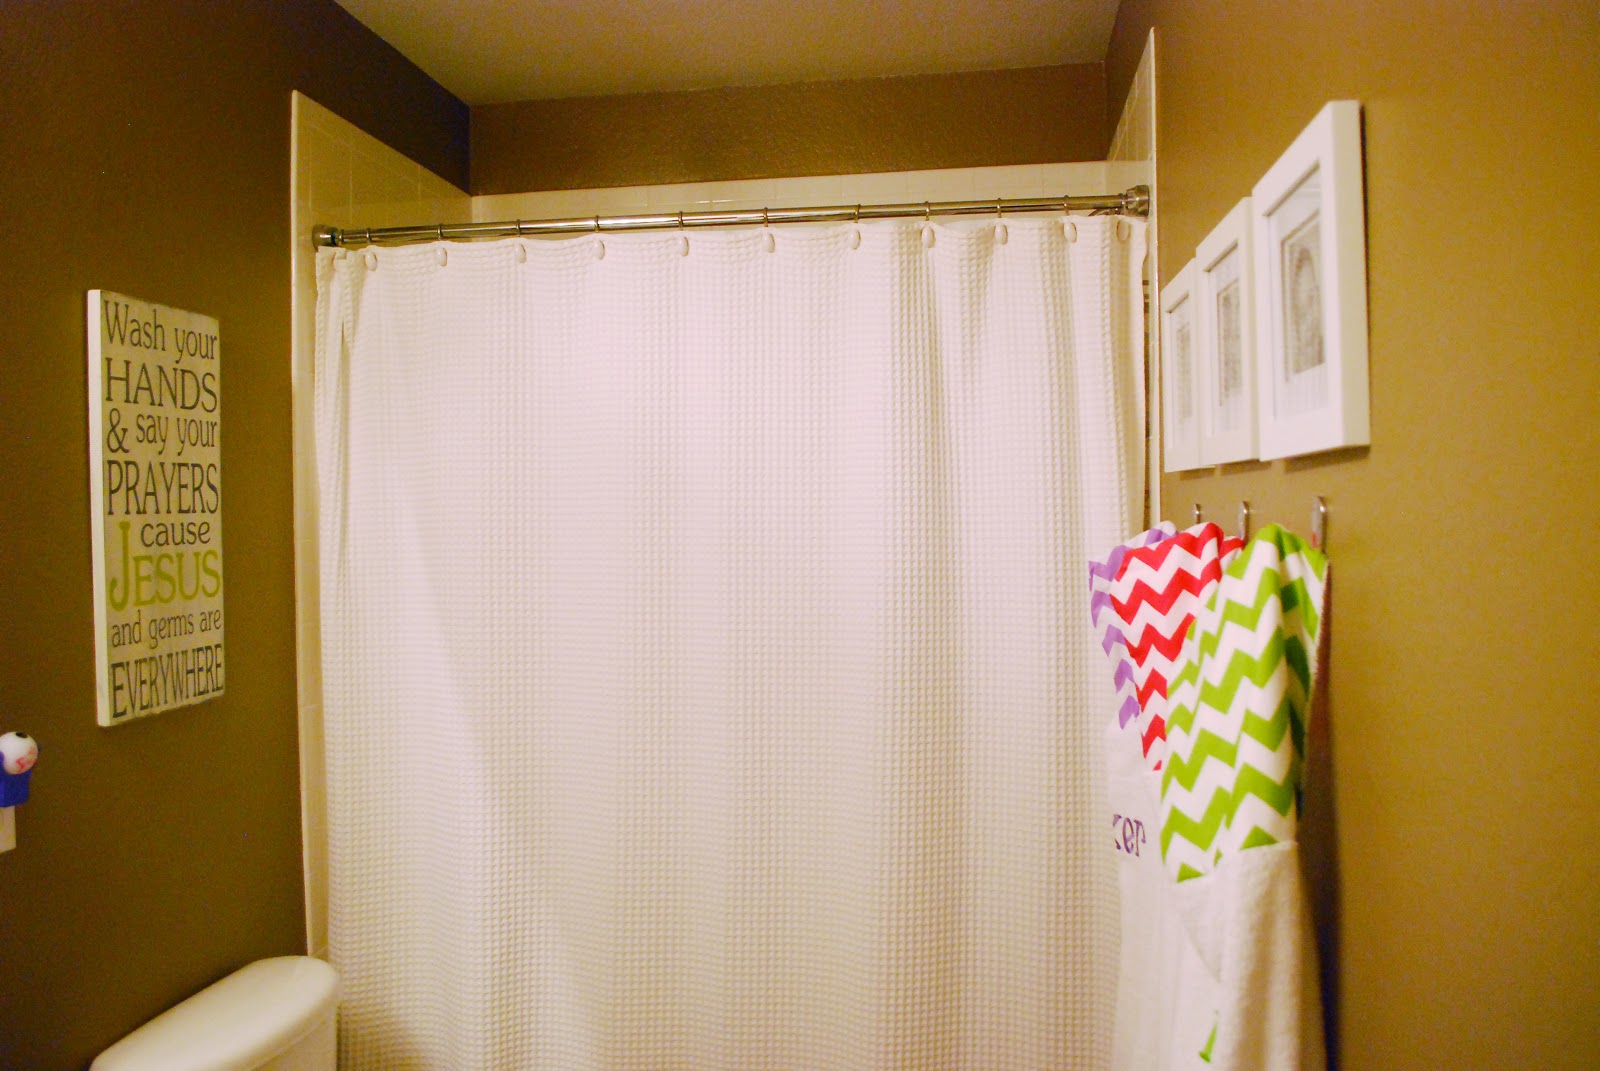
With baby #3 coming...I also knew I needed a better way to hang their towels to dry.  We had the original towel rack that is good for drying 1, maybe 2, towels at a time.  Not very functional.

So when I saw this a while back...I knew that's what I wanted to do.


My sister, Kristin, made these towels for the kids and my mom embroidered their names.  I love how all of this turned out.  And, of course, after Nolan is born...we'll take new pictures for those frames.  :)


I guess I would like to still change out the light fixtures....but this will do for now.

______________


Made to be a Momma Create & Inspire Linky Party

Friday, April 12, 2013

DIY Burlap Family Rules Sign


Since about 18-19 weeks in this pregnancy I've considered myself to be in 'nesting mode'.  I've mentioned before that we've lived in this house just over 3 and half years and I'm just now getting around to 'decorating' and hanging things on the wall.

I've seen these family rules signs all around.  There are many many ways to do it.  But I saw a burlap sign when visiting trade days recently and thought I could maybe do it myself.

So I picked up one yard of burlap (at 40% off)....and this frame at 50% off (all at Hobby Lobby) and cut it a few inches bigger than 18x24 (but if I were you....give yourself quite a bit more room around the edges...then you won't have to worry about having enough around the edges when it comes to centering in the frame).


I also picked up some charcoal gray paint, this stencil and brushes (all were on sale except the brushes).


Then I just started stenciling.  I kind of eyeballed/half way measured where I needed to start.  Fortunately- I did pretty well centering it from top to bottom....but if I had it to do over...I would have started more to the left.  I thought I might have to stop and let the letters dry before moving to the next, but I didn't.  I didn't lay the paint on too thick so I think that helped.  Also- you can see some places where it left spots...but I kind of like that look.  :)


I then purchased a tan piece of foam board (at 50% off).  White could possibly be fine...but I was worried if you could see through the burlap- I wanted it to be tan, too.  Geoff did a great job cutting the foam board so that it fit nice and snug into the frame.

Geoff painted a coat of mod podge on top of the foam board and glued down the burlap (this was to help keep it stable for framing).


We let it dry overnight...and the next morning...Geoff basically just popped the foam board with the burlap into the frame.  Because of the snug fit- we didn't have to use nails or anything else to keep it inside.

And the finished product.  I added 2 little burlap rosettes that I made to give it a little something.


Right now- I have it hanging just past our entry way....but not quite sure that's where I want to keep it.  We'll see.


I do love how it turned out though.  Not perfect...and part of me wants to redo it. :)  But the imperfections are growing on me.


And I do love what it says, too.


____________


Create & Inspire Linky PartySee Vanessa CraftDIY Show OffWatch Out MarthaThe DIY DreamerMade to be a Momma

Wednesday, April 3, 2013

DIY Nursery Mobile

***To see the completed nursery….go here.


I knew I wanted to do a mobile for Nolan's nursery...and I new I wanted it to have 3 qualities: 
1) Cute. 2) Cheap. 3) Easy.

And this one meets those qualifications!  I don't have an exact number- but this cost me less than $10 to make.

And this is a very weak tutorial.  I didn't take as many step-by-step pictures as I should have...so if you have any questions please ask!


I took the inside circle of a 10 inch embroidery hoop and painted it gray.  I just used cheap acrylic paint that I got on sale at Hobby Lobby.


And the number one thing that kept this project so cheap is that I already owned these circle punches.  If I didn't have these...I would have tried to find circles to use as templates and try to cut them out (but that would have taken a LOT longer!) or just maybe skipped the whole having a mobile thing.  :)


The next picture was taken with my phone and awful quality...but I punched out my scrapbook paper and put them in stacks in a line like this.


Then I just took the circles and sewed them together.  Don't forget to pull out quite a bit of thread before you start to sew your first circle so you will have some thread to work with when you go to tie it to your hoop.  My finished strips are not all equal.  I did try my best by counting my stitches between circles (I would count 10) and I think it came out close enough.  I wasn't going for perfection here.  ;)


After sewing all of the strips...I used fishing line to make a cross in the hoop....


And tied some fishing line in 4 (mostly equal) parts to the hoop....and left the lines long and just wrapped around them this hanger while I attached the sewn circle strips to the hoop (I hope this makes sense!)  I used 9 total sewn strips (8 around the hoop/circle....and one in the middle- (see picture above to get a better idea of this)).


And the final product!  Geoff screwed a hook into the ceiling to hang it from (no picture).


 I do love how it turned out.  And how cheap and easy it was.  ;)


Nolan's view...


 There are still a few more things I'd like to do to with the nursery that I am very slowly getting to.  Hopefully before he gets here! (Otherwise- it will, more than likely, never get done. Ha!)


________________ 


  Made to be a MommaCreate & Inspire Linky PartyWatch Out MarthaThe DIY DreamerDIY Show Off

LinkWithin

Related Posts with Thumbnails